I think I like age 3 the best, because of imaginary play. It has become a major factor in why I chose to keep my daughter in gymnastics where she currently is instead of moving her to a “real” gym…you know, where they wear leotards and practice pointing and flexing their toes. Where she is now, they are always playing pretend with full thematic classes while they learn new gross motor and social skills. She loves the “pretend” aspect of whatever she is doing these days, and I am constantly amazed at what she creates (scenarios, characters, dilemmas, etc.) in her mind through imaginary play.
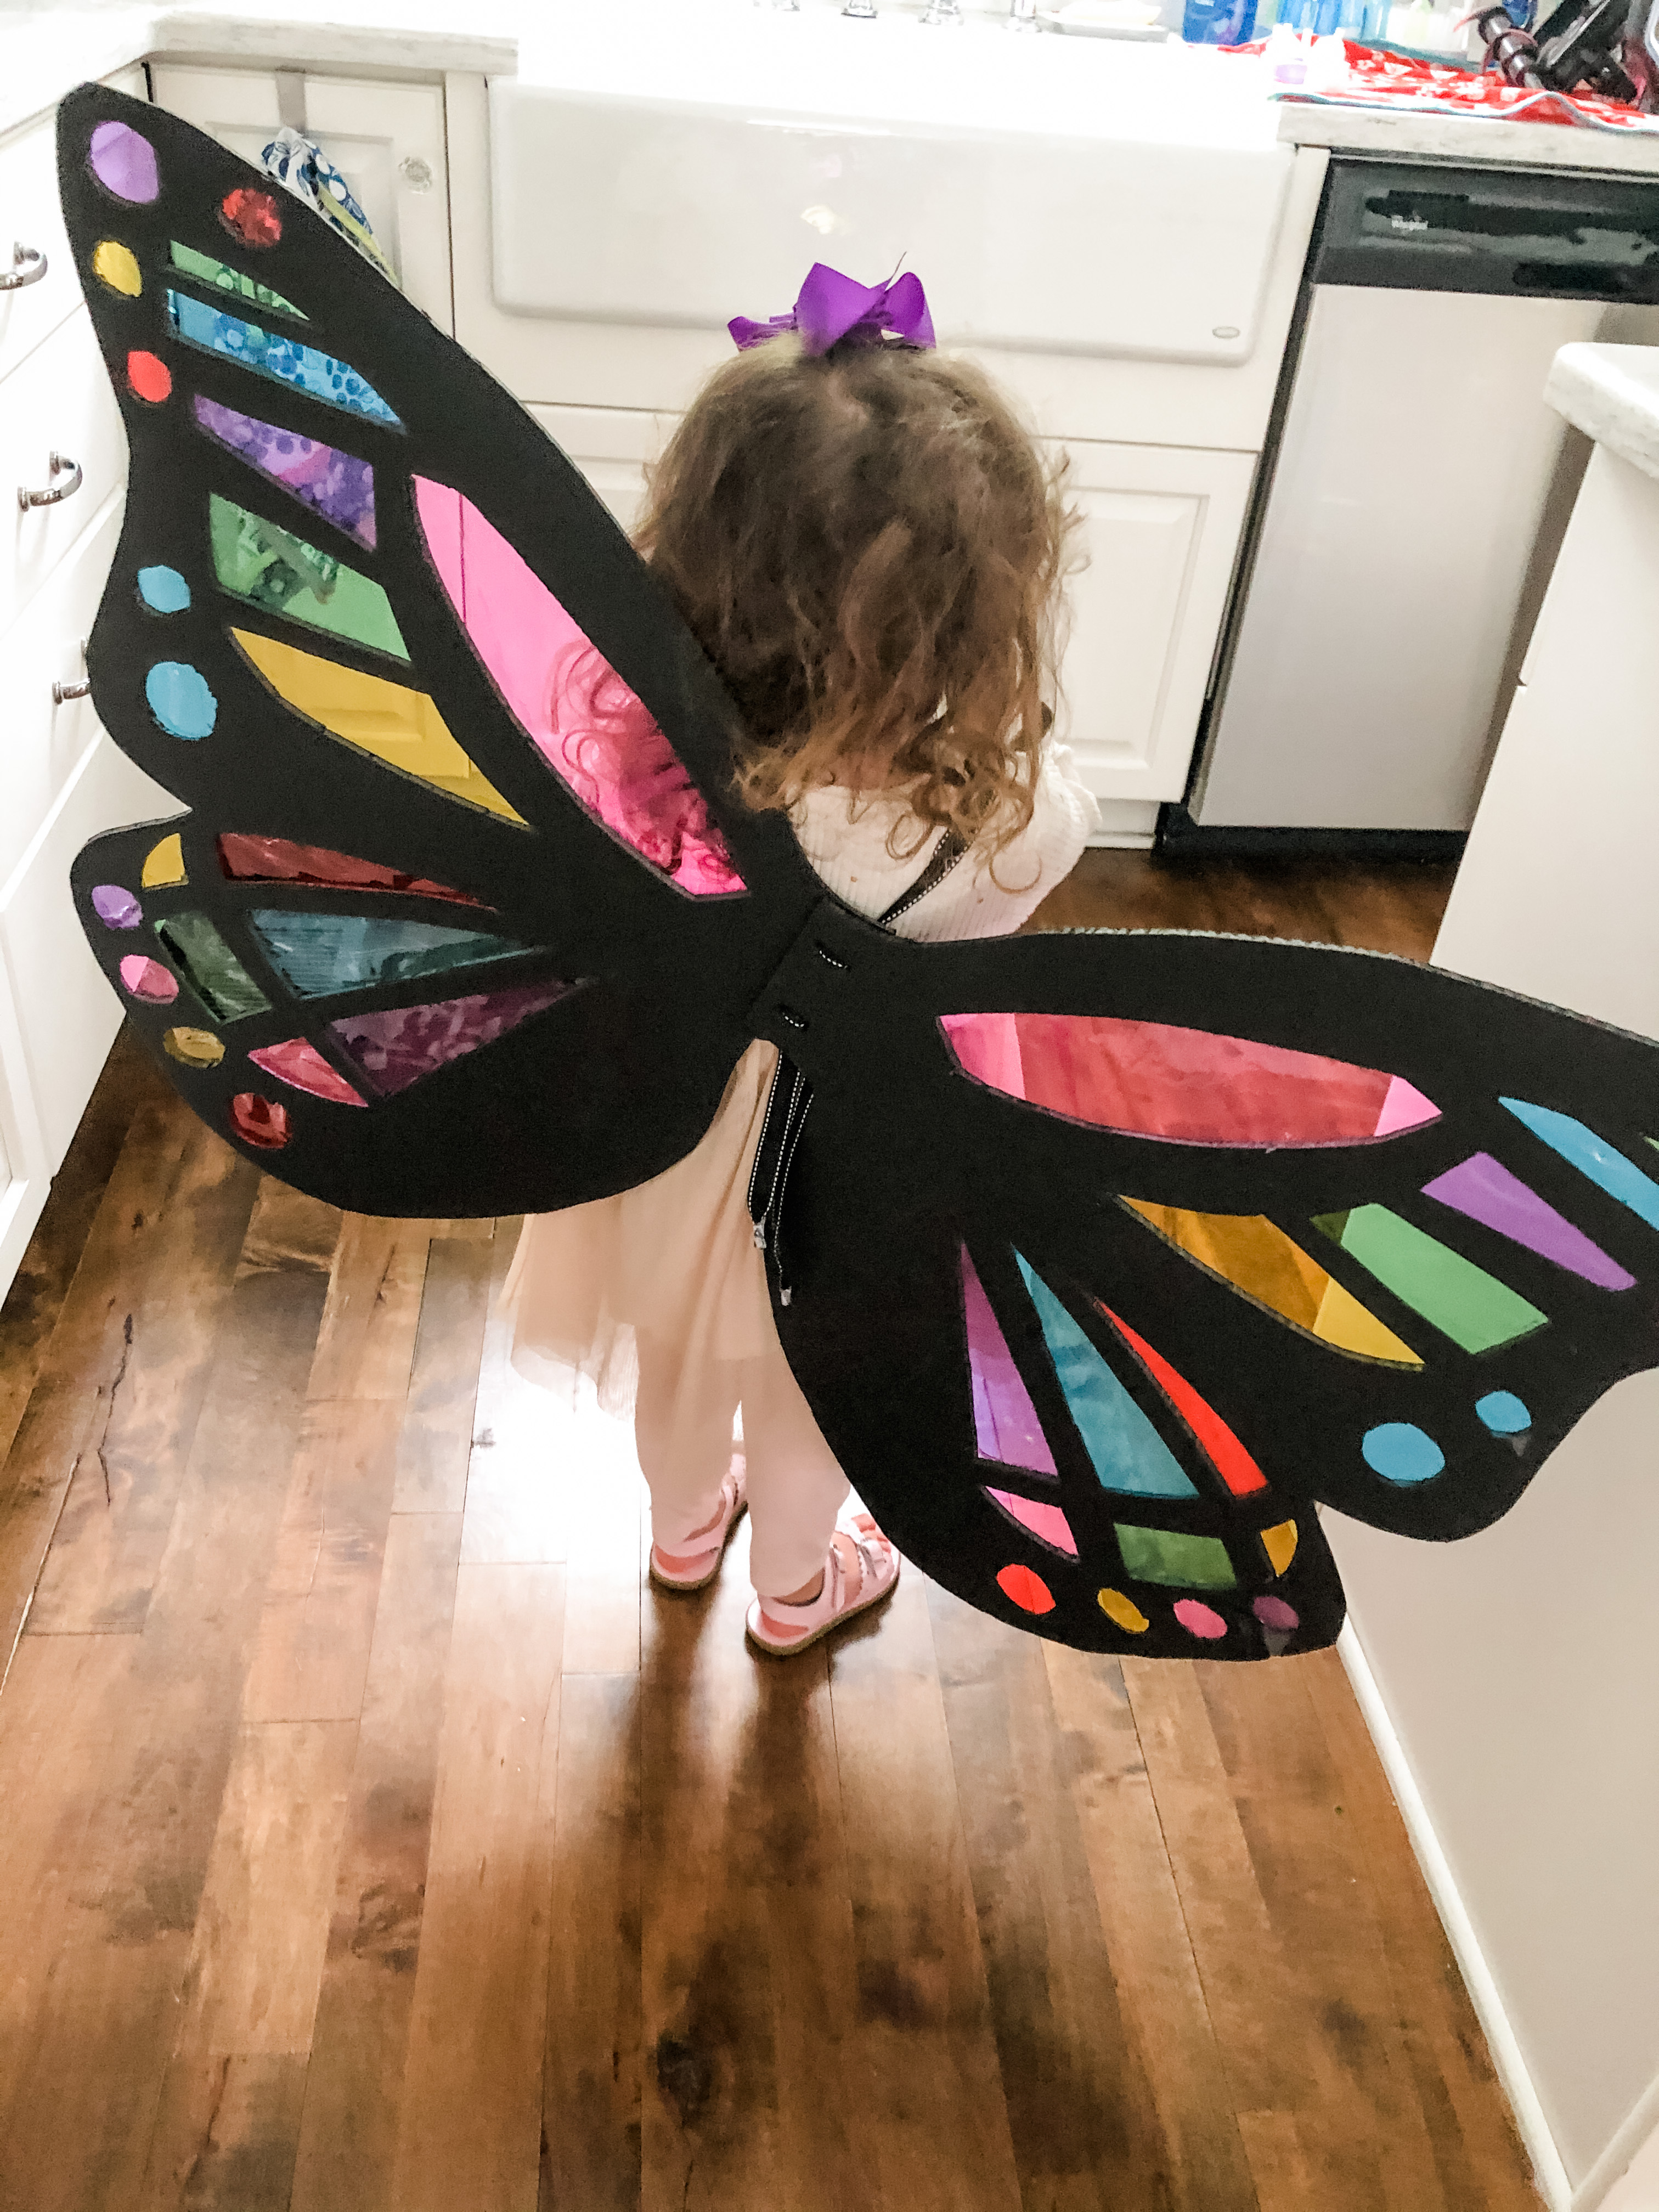
And I have to tell you-making these butterfly wings really elevated our level of dress up around here! Although they may look hard or time consuming to make, the process was actually pretty easy. For most of it, you don’t even need to be exact-except for actually cutting the wings!
Here’s what you’ll need:
- Black foam board (I used two poster sized boards for this project!). I bought mine at Hobby Lobby, but an office supply store should have them as well. You can also use cardboard, but the foam board is so.much.easier to cut!
- Cellophane sheets– These come in different sizes, but these are the ones I used.
- Hot glue gun
- Scissors
- Ribbon
- Exacto knife/razor blade/etc. to cut your board
As an Amazon Associate I earn from qualifying purchases.
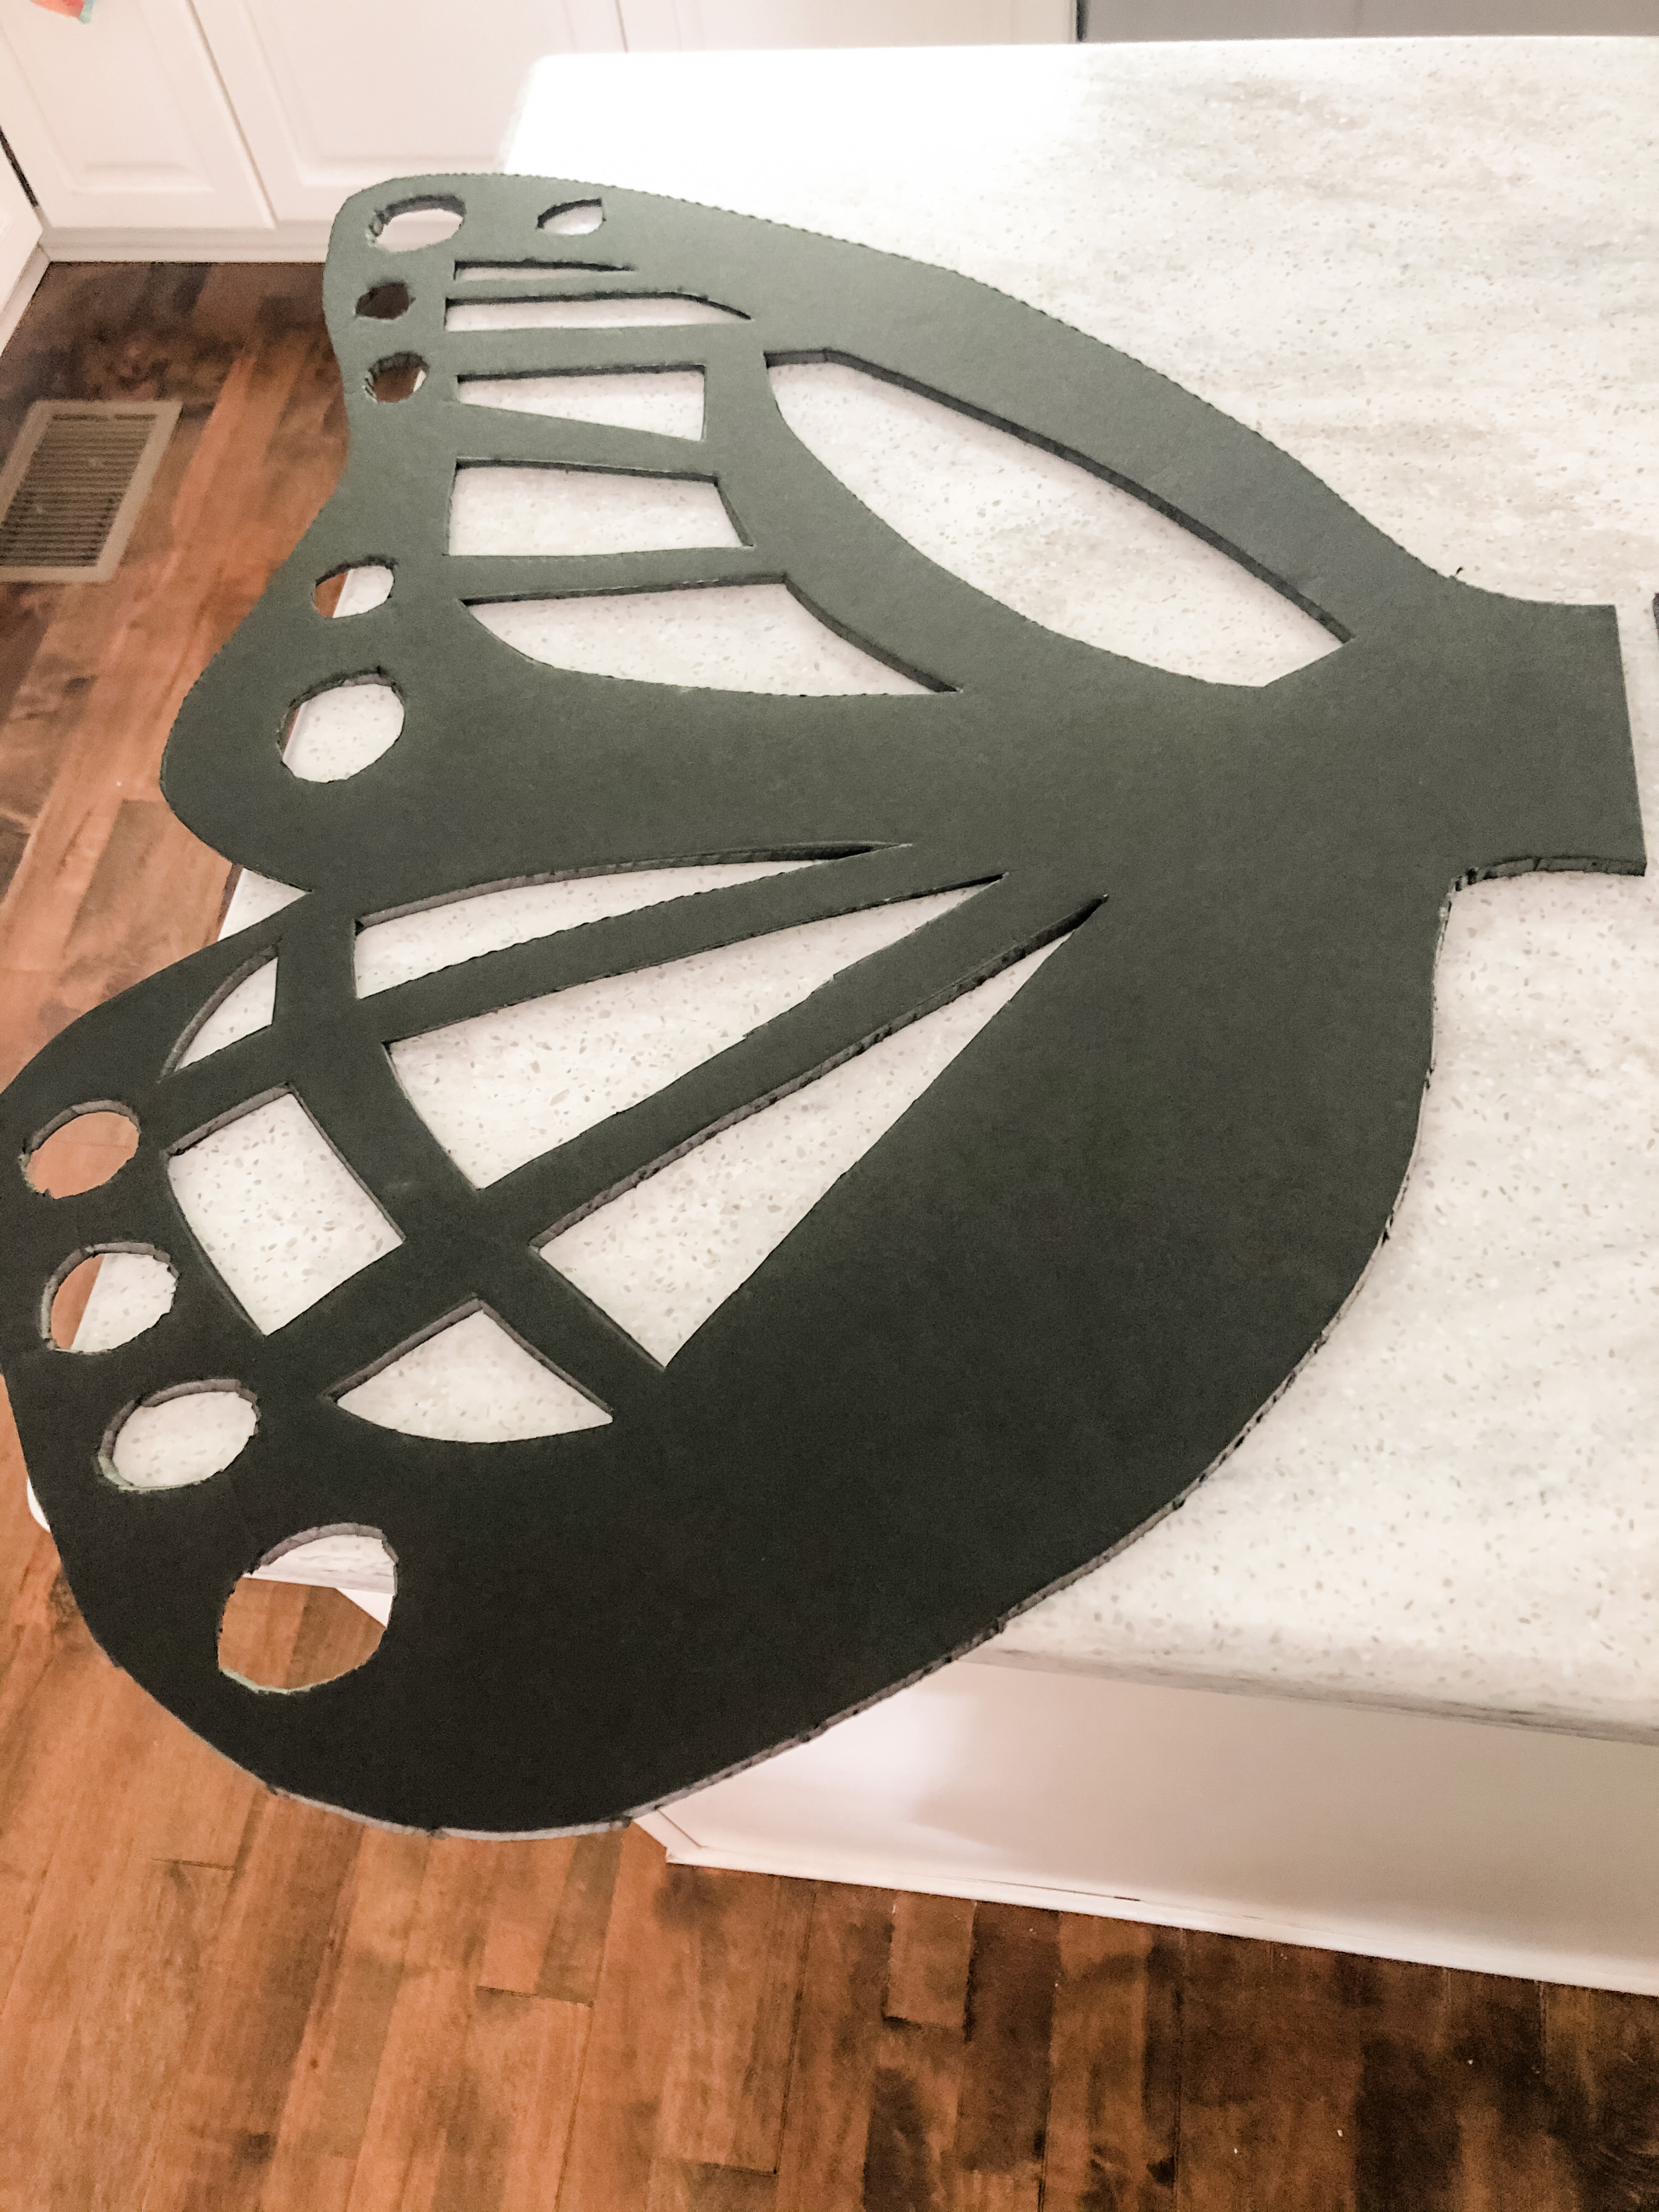
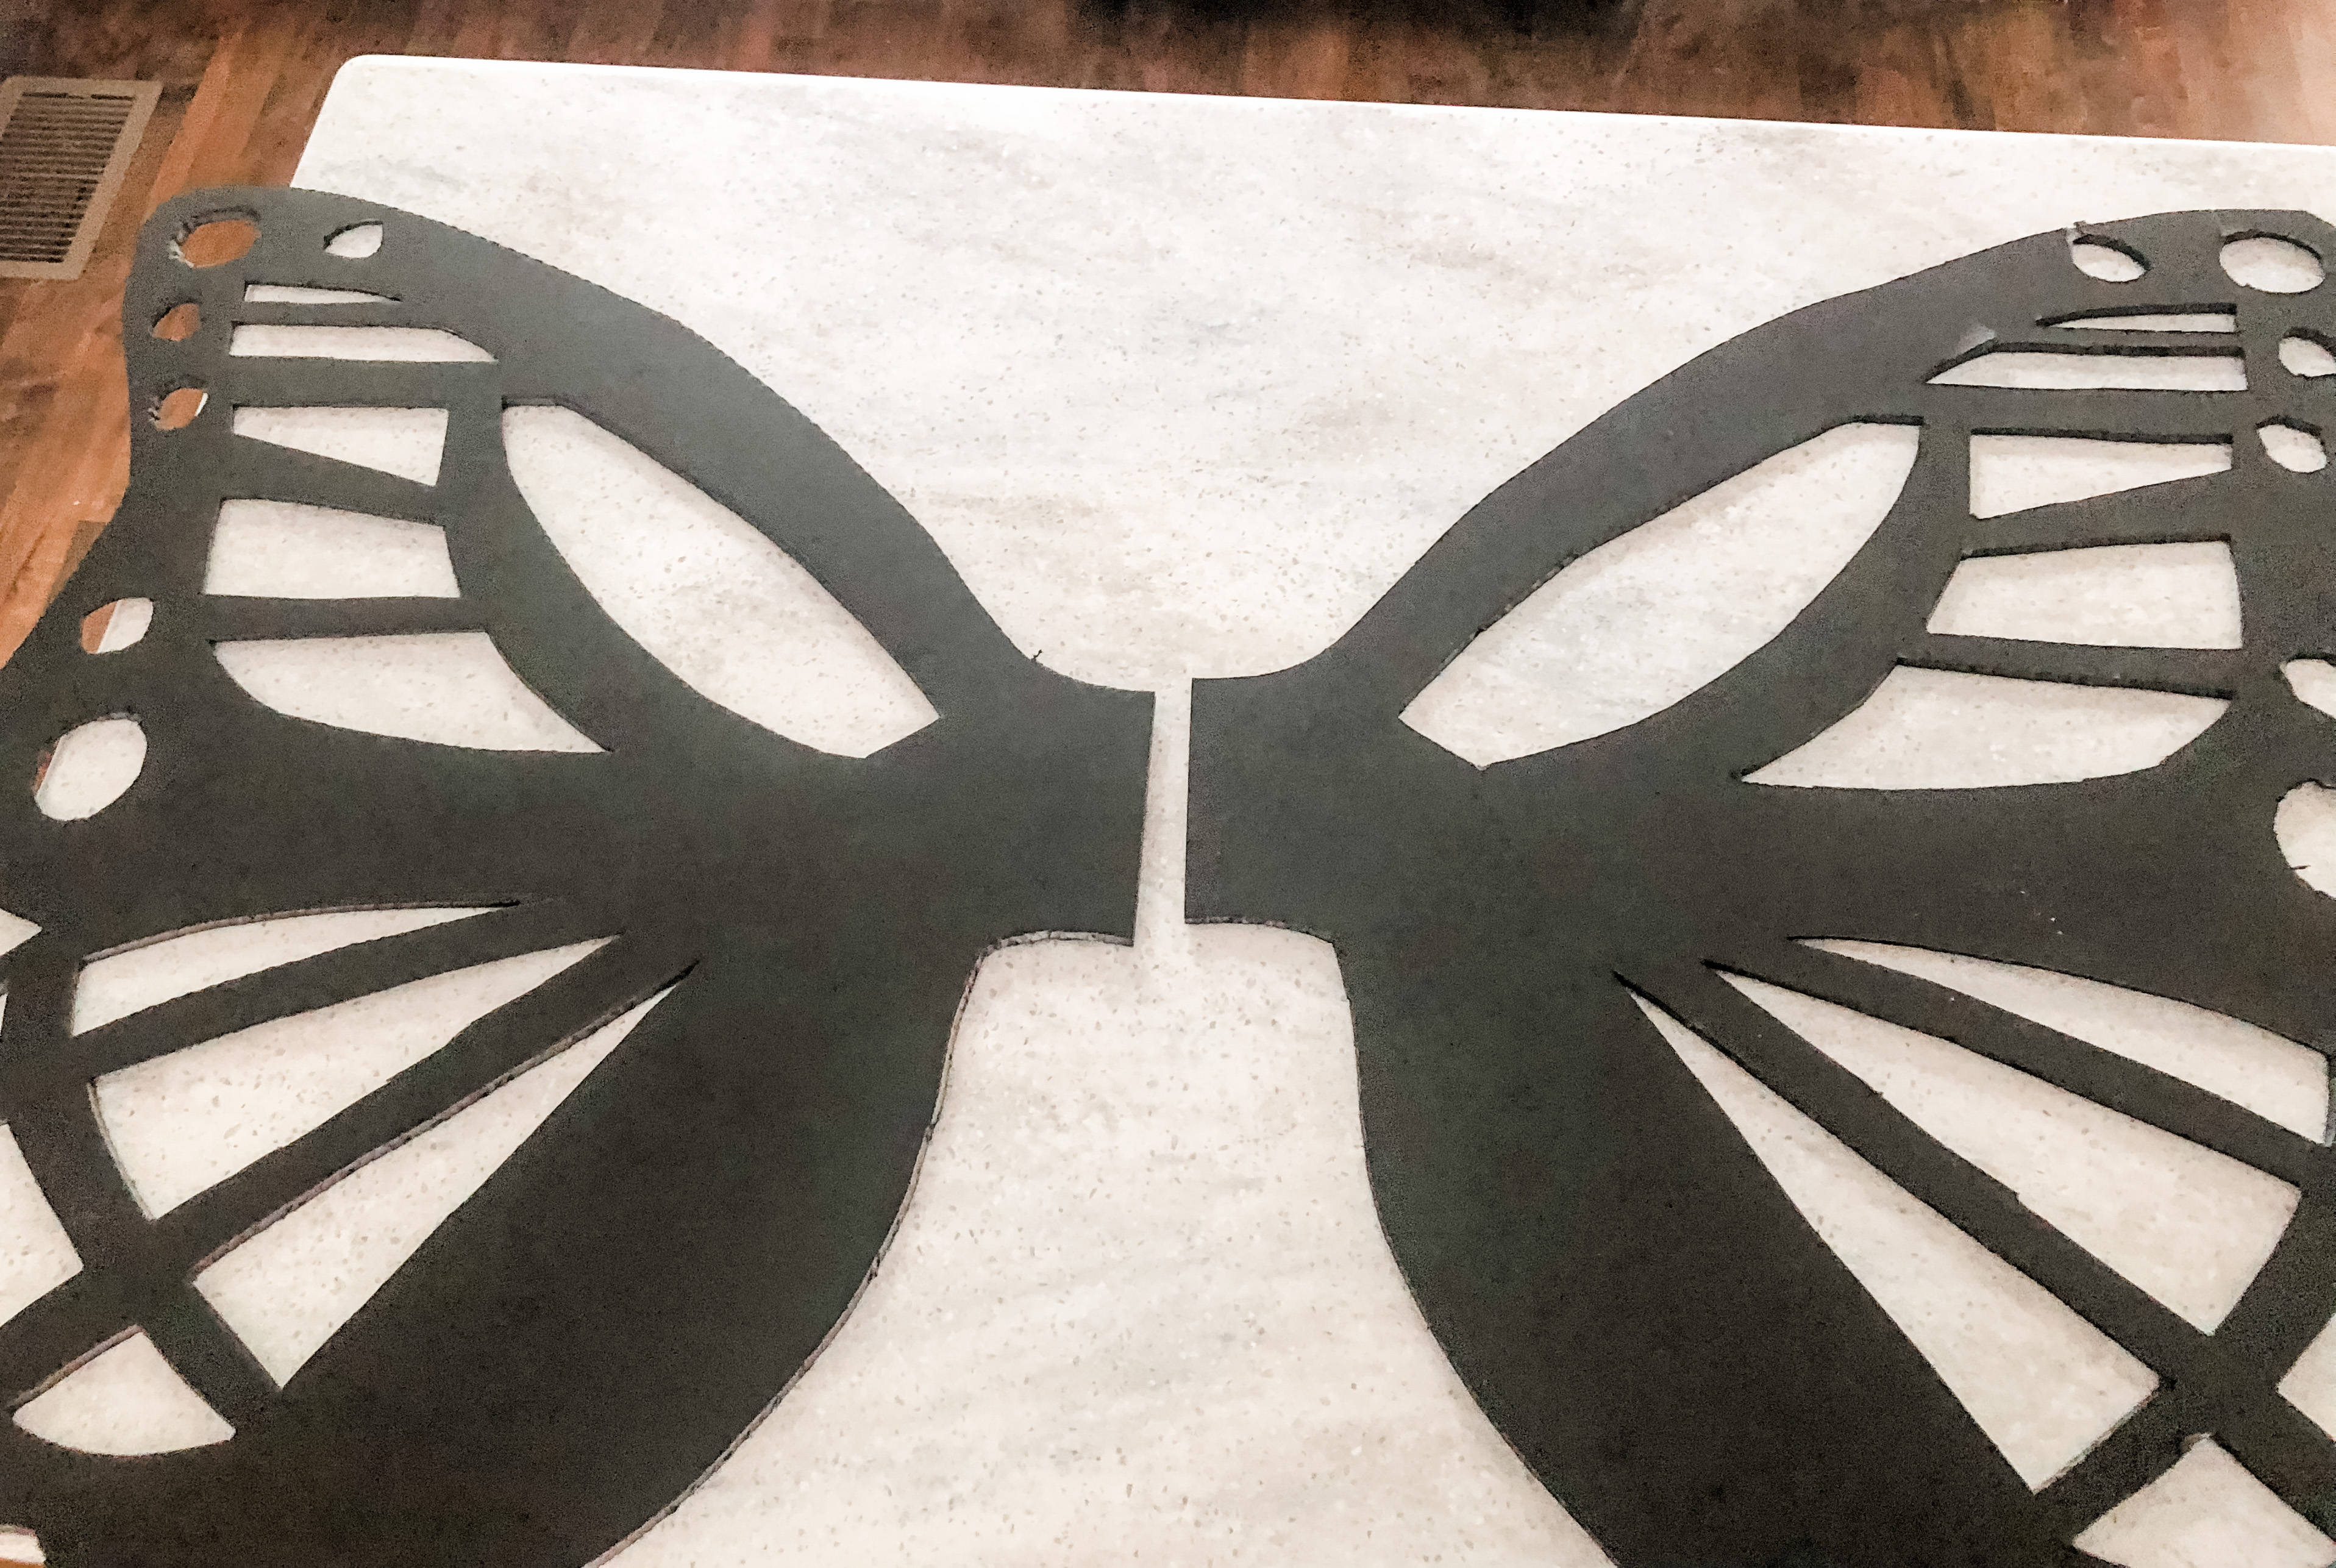
When I first went to cut my butterfly wings, I really wished I had a projector, so I could project an image and make a stencil as big as what I needed these wings to be. Since I don’t have one of those, I free handed one wing of the butterfly, taking up one full foam board. As you’ll see in the picture below, I left a “tab” on the thorax of the butterfly. This will be where you’ll attach both wings to each other at the end. THIS IS MAJOR!
After I cut it out using a razor blade, I then used this wing as the stencil for the other wing. This way they were identical and symmetrical.
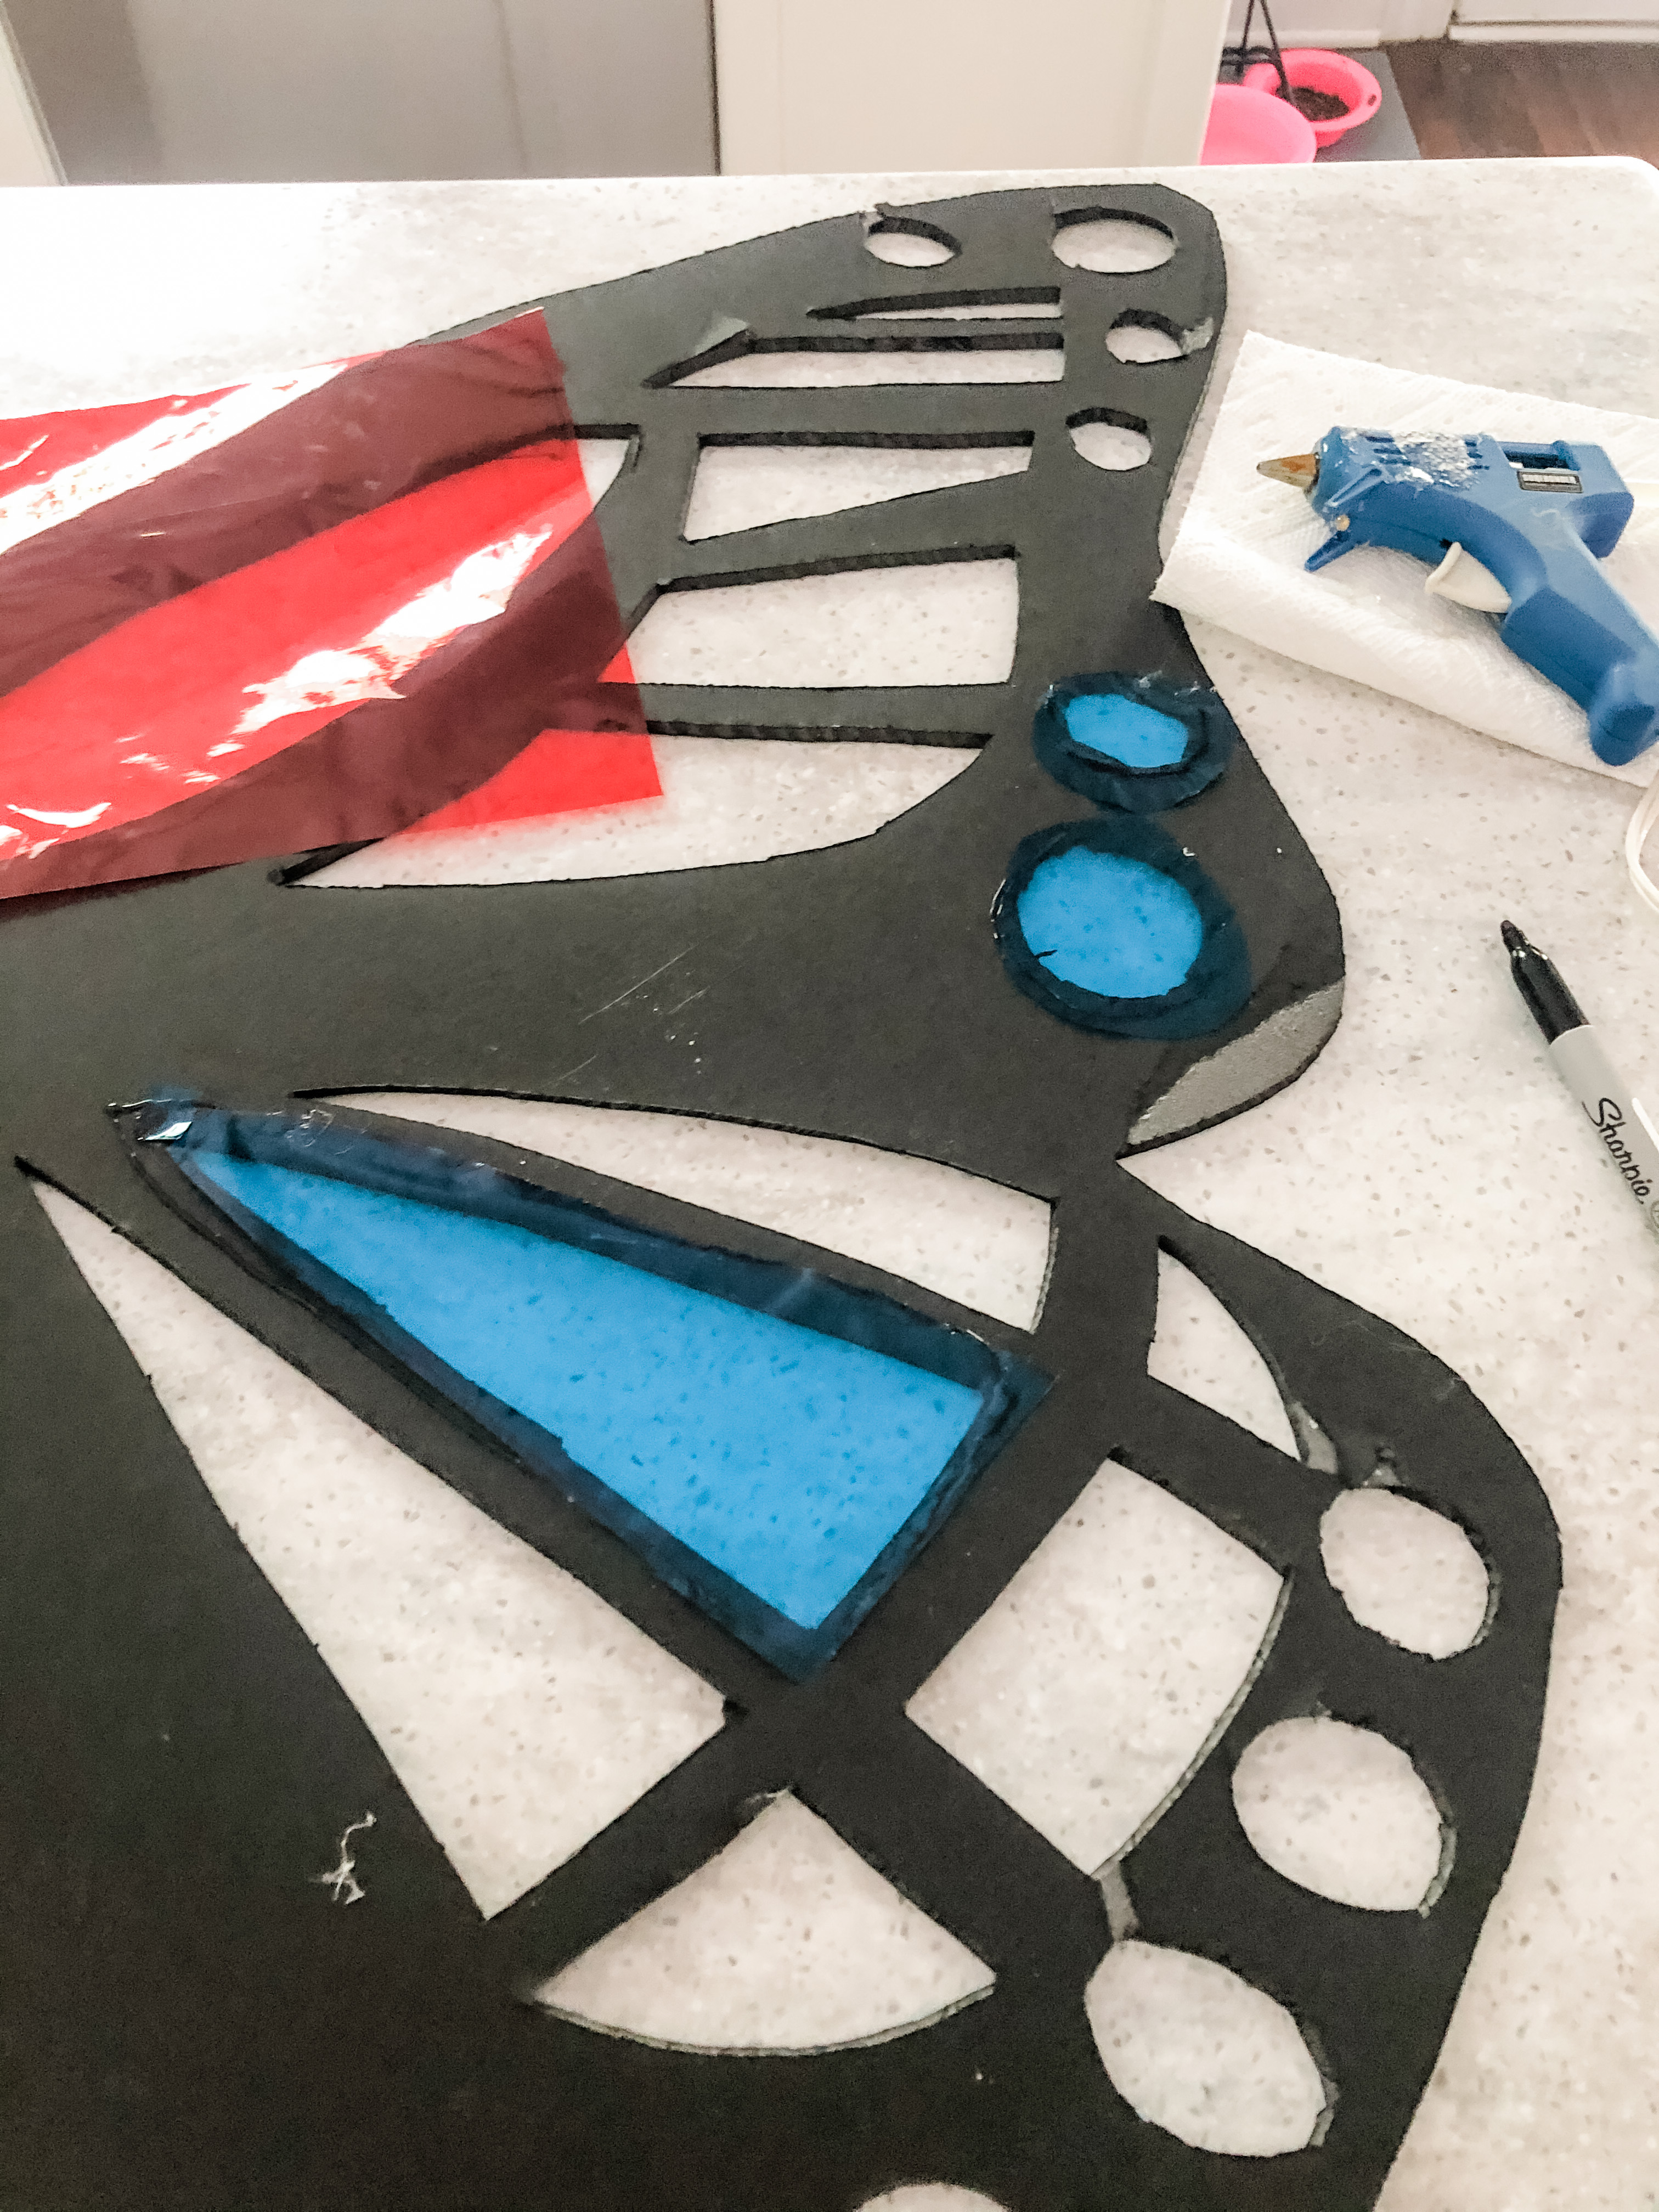
If you’re not a perfectionist like me-or even if you are I guess-and the first step took all of your brain power and time making the wings precise, rest assured the next part is pretty low key in the effort department. Taking the cellophane sheets, choose a color for a space on the wing and trace it a little bigger than the actual hole, so you have enough of the sheet to glue down.
Instead of doing one whole wing at a time, I did both at the same time: I would trace out the shape on the cellophane sheet and immediately cut another sheet in the same shape for the other wing. This way I also guaranteed I was matching the wings and the holes with the same colors.
You don’t have to cut the sheets neatly (It’s kind of hard to anyway)! Simply use your hot glue gun to glue the sheets on the back of the wings. Note: be careful that you are working on the “back” of both sides of your wings 😉

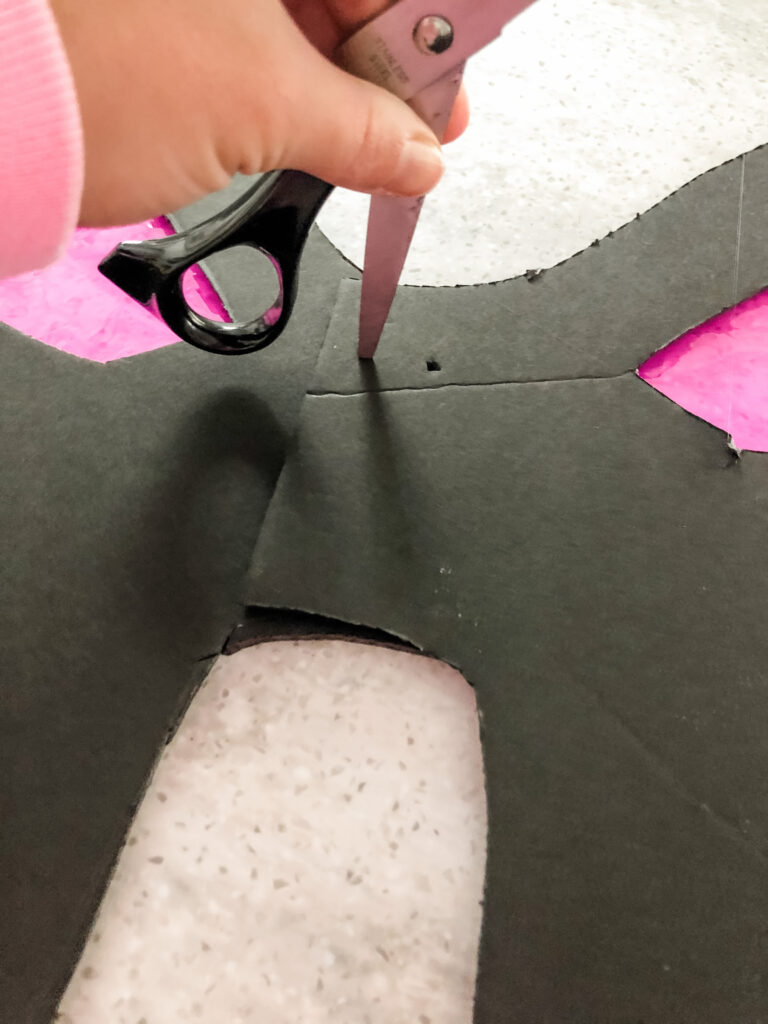
When you have all the holes covered on both wings, place the wings next to each other (it looks awesome so far, doesn’t it?) and overlap the “tabs” you had cut on the thorax. Using scissors, I simple punctured four holes (made it look like holes in a button) through both wings, overlapped. If you chose to use cardboard, this may be a little more difficult as the material is harder. The foam board is very soft, and this took little effort or muscle!
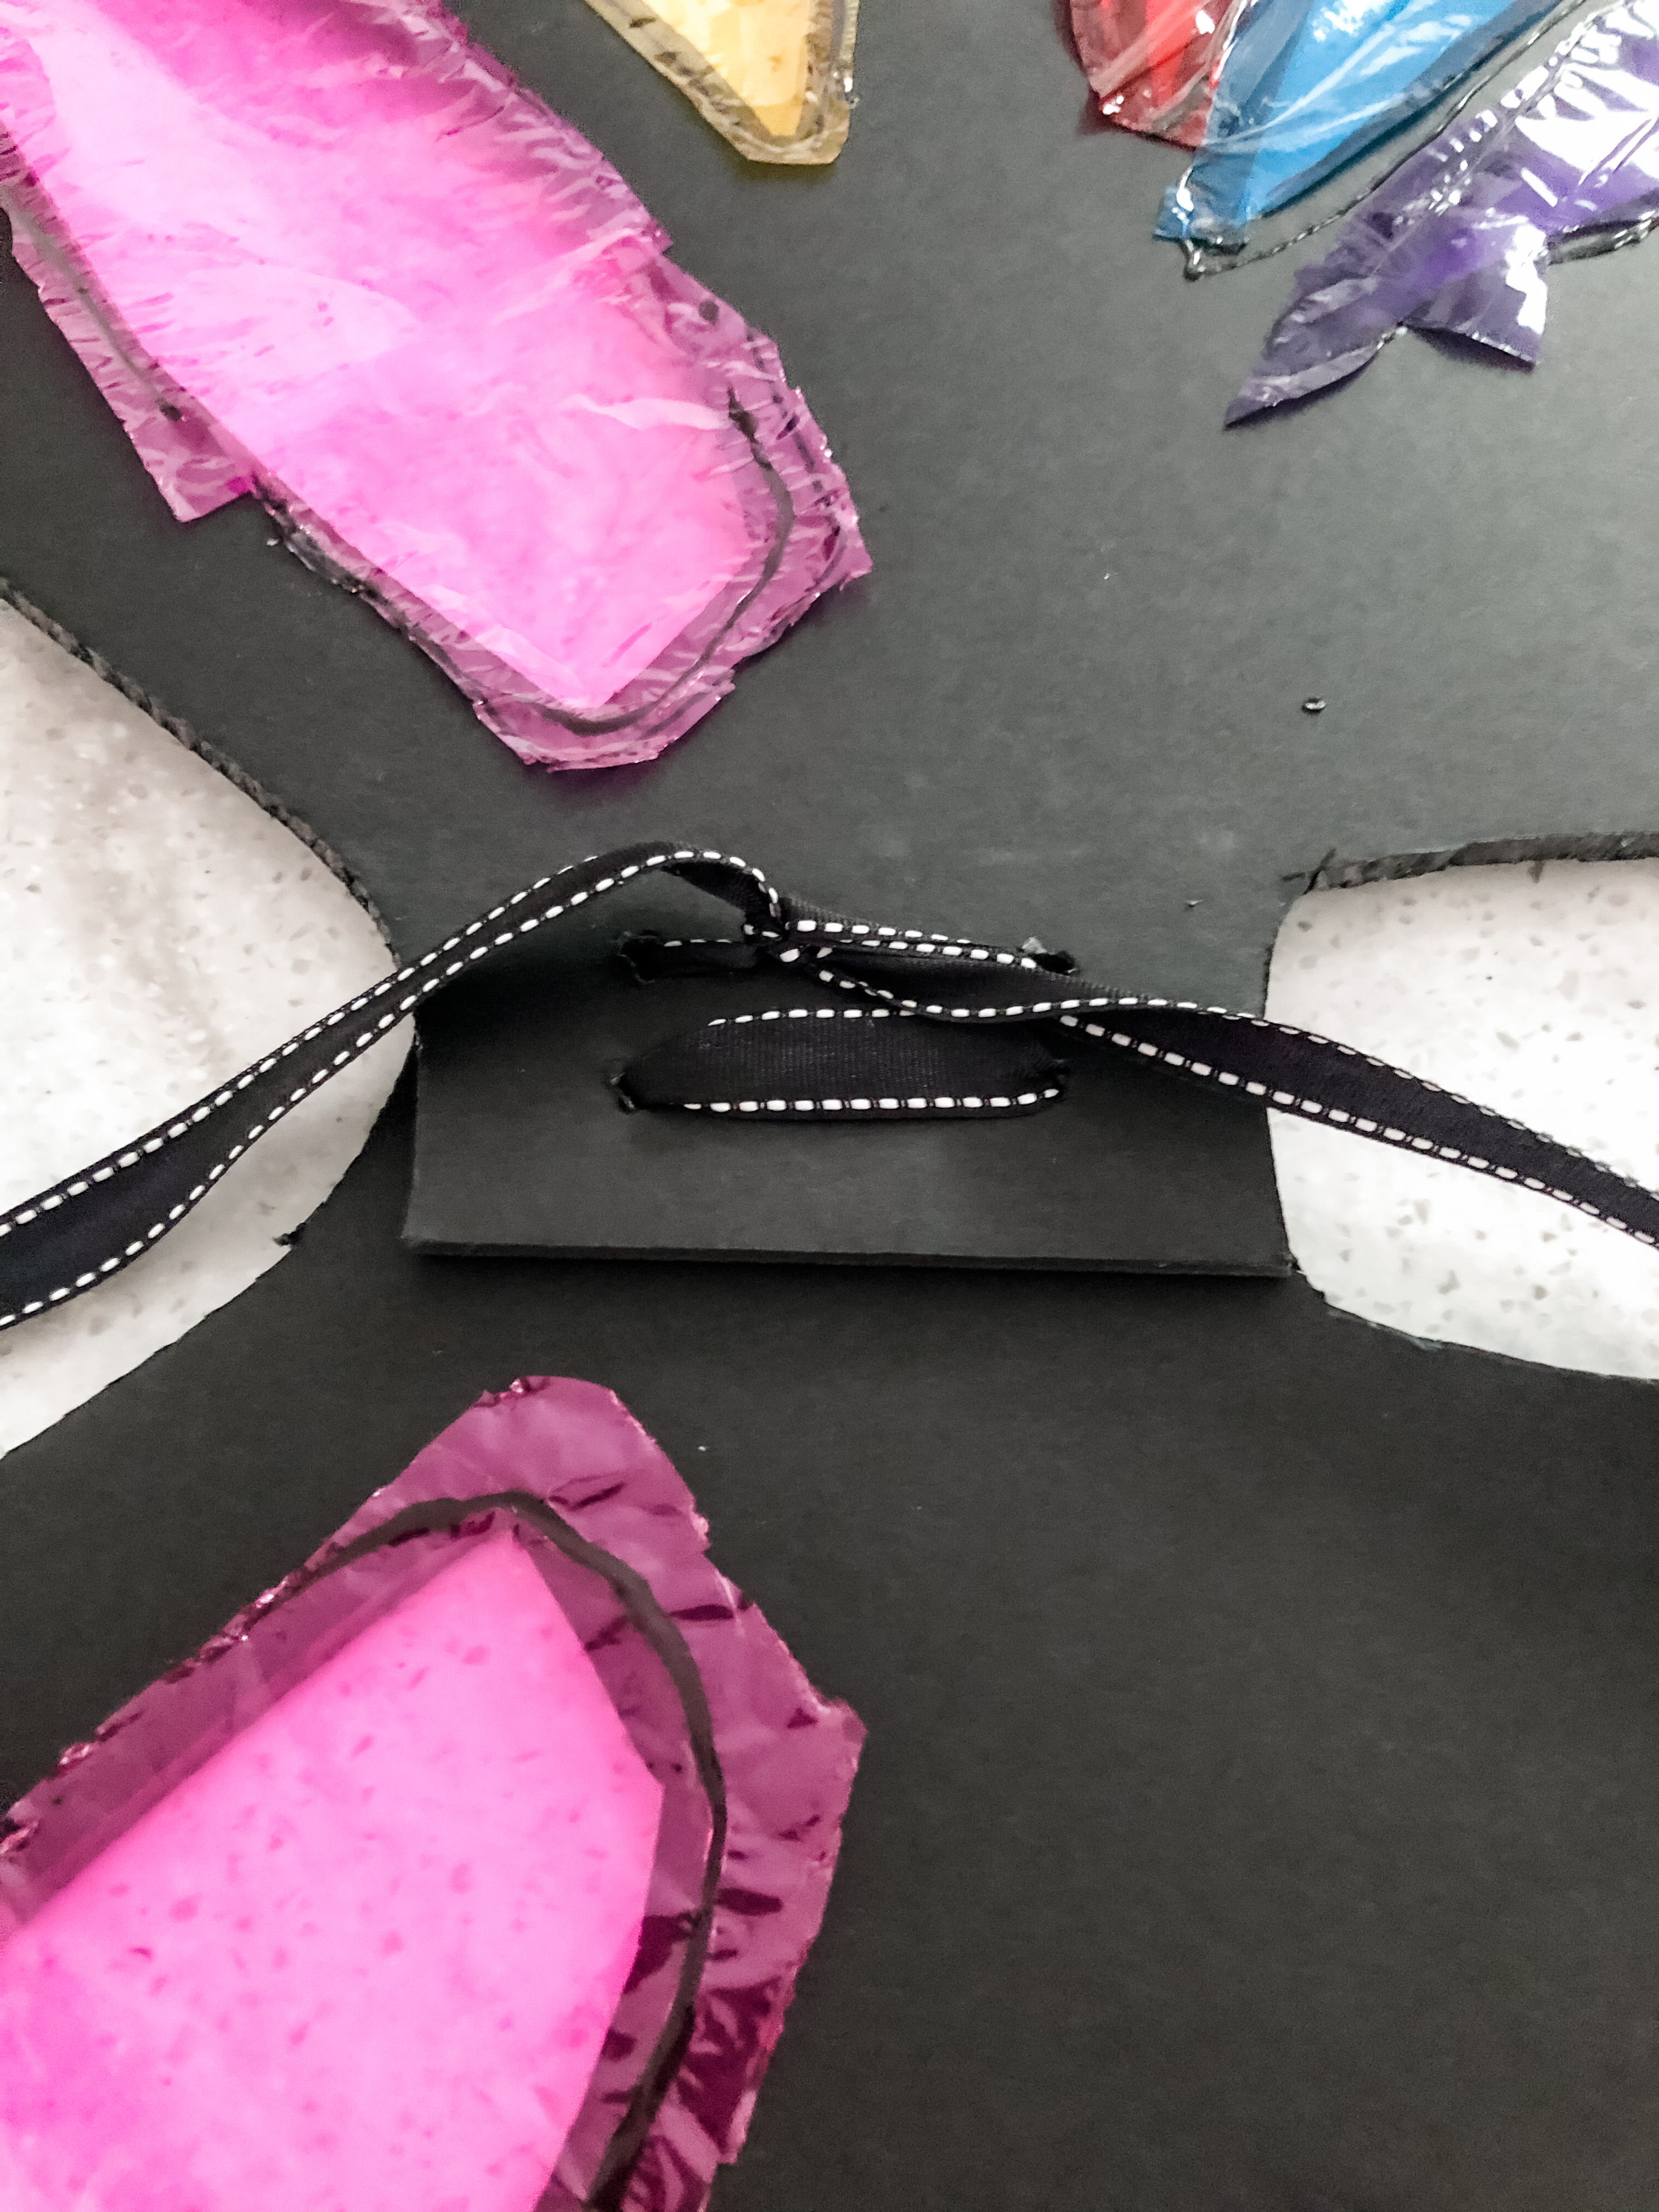
Next, I laced the ribbon I chose to use (I had this on hand already from another project!), like I would if I was threading a button/sewing a button onto something, and finishing it by tying a knot to keep both wings together as “one” unit now.
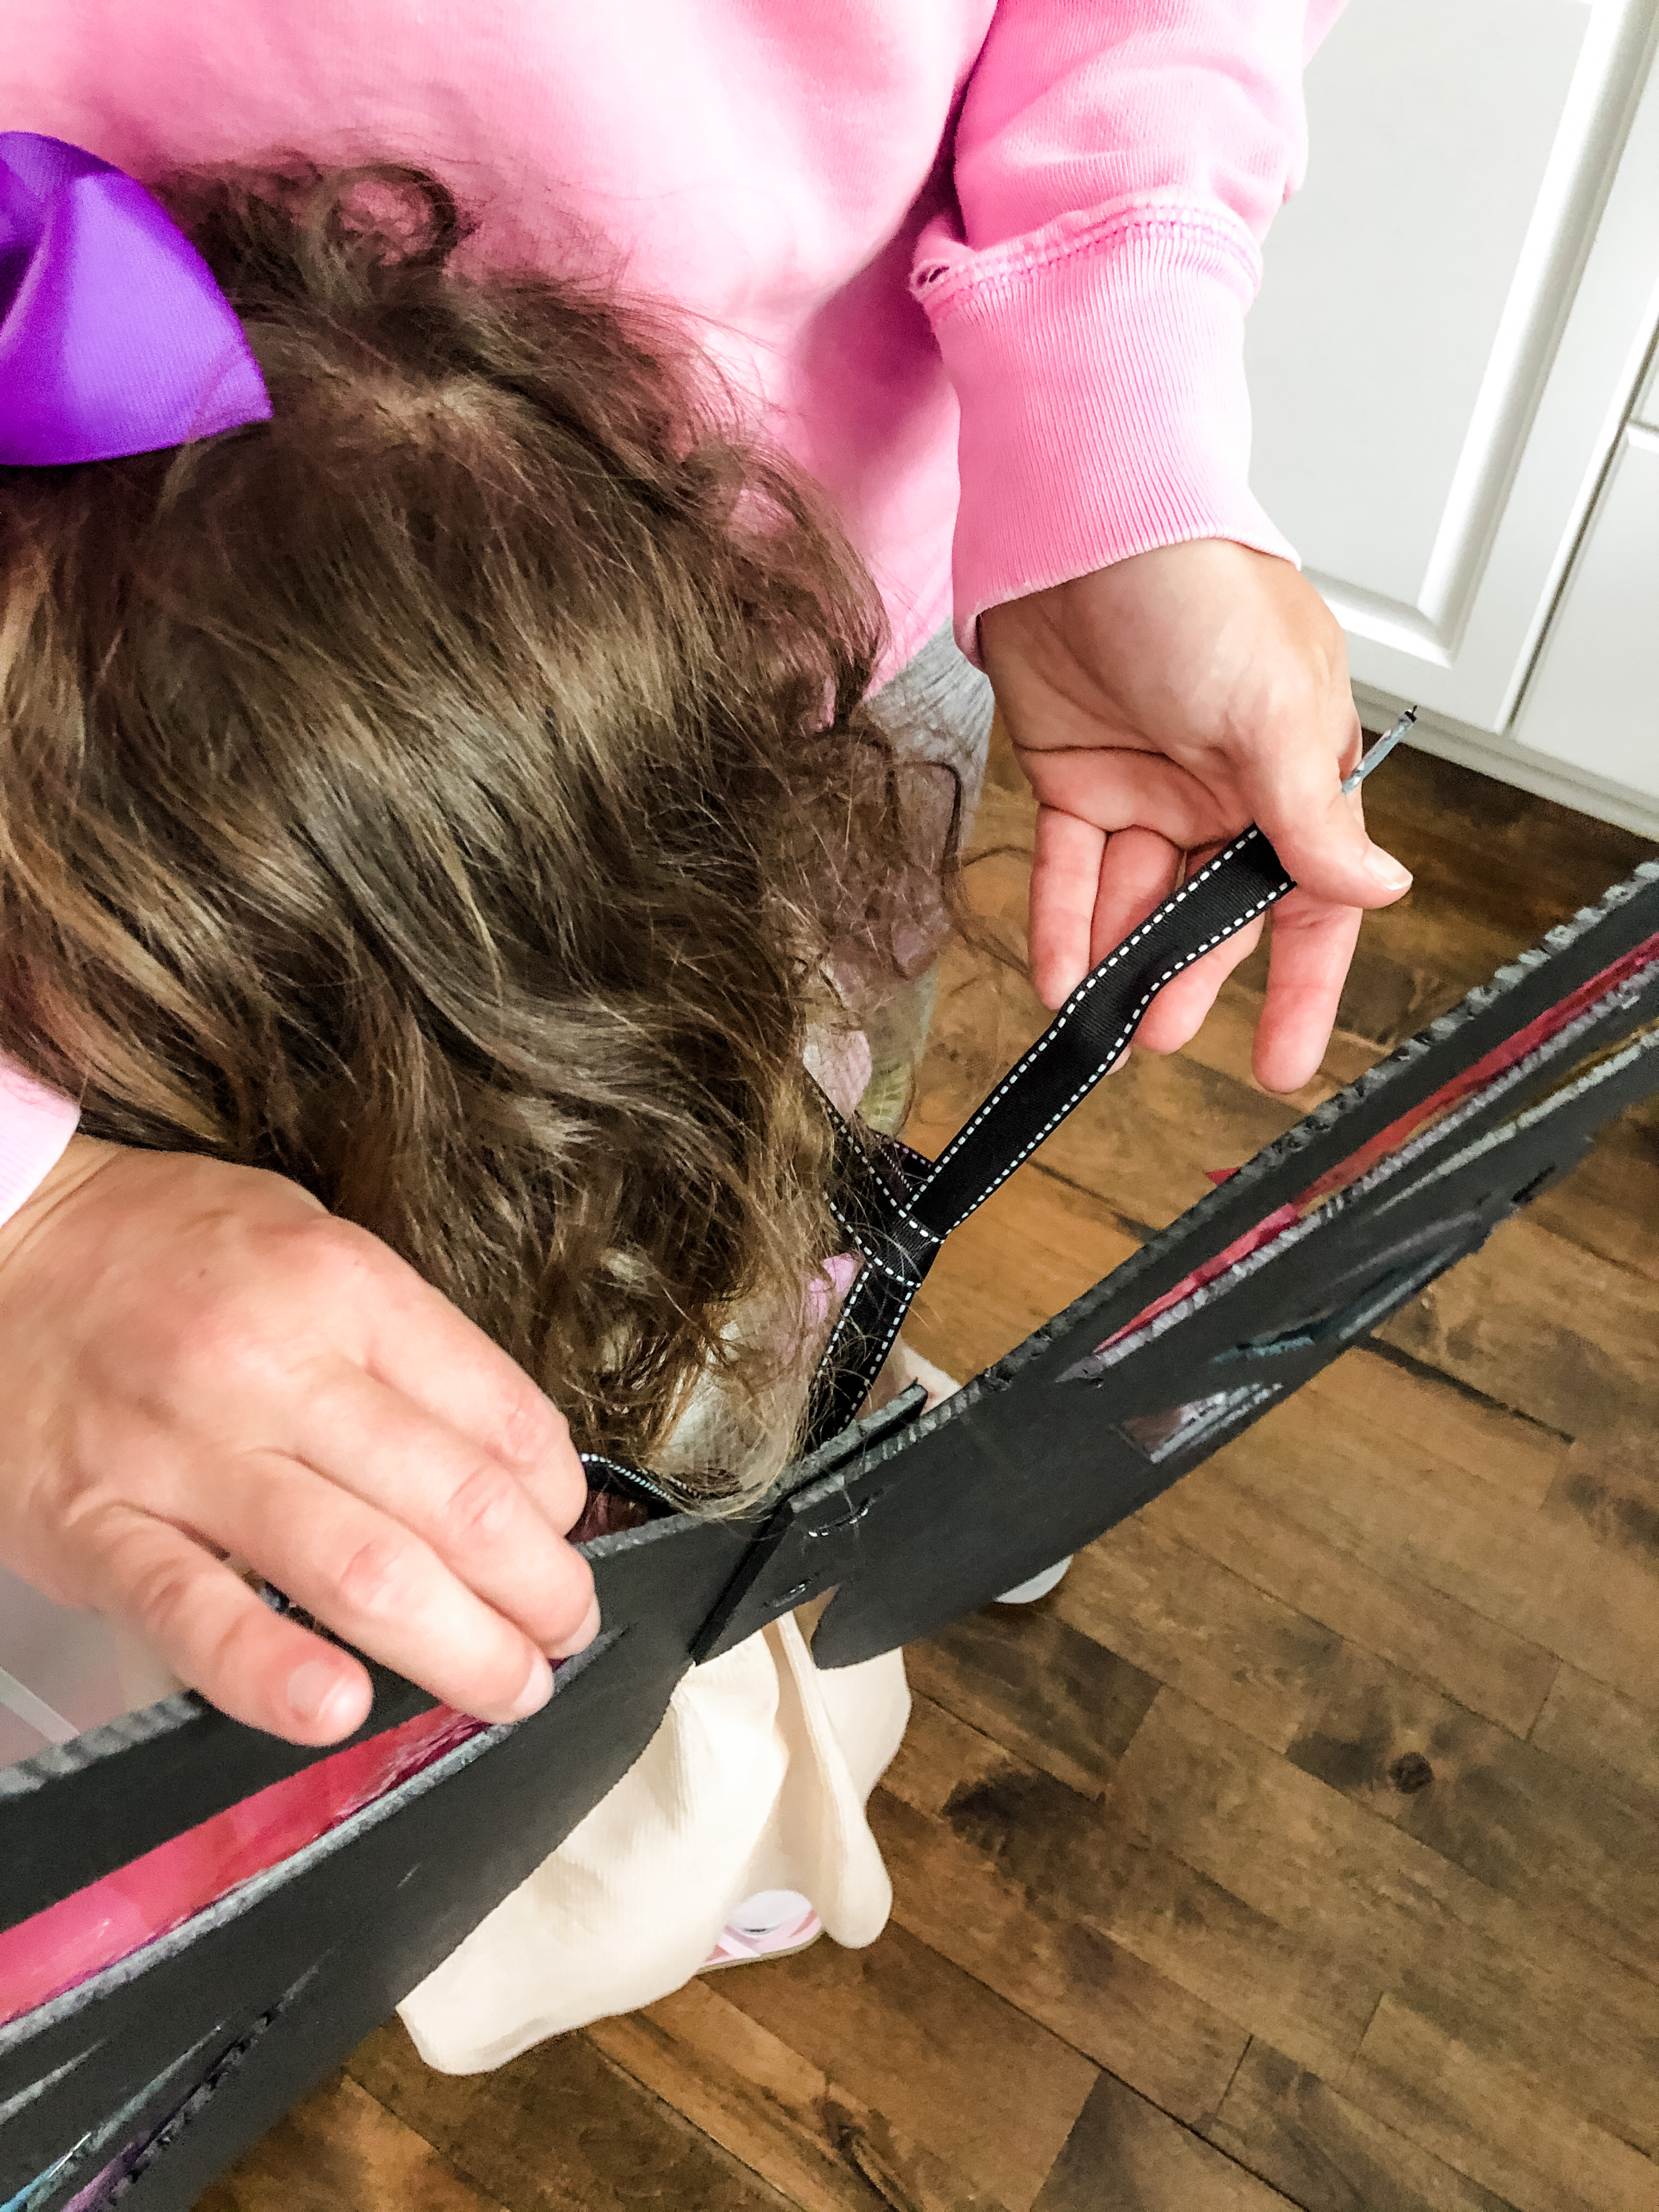
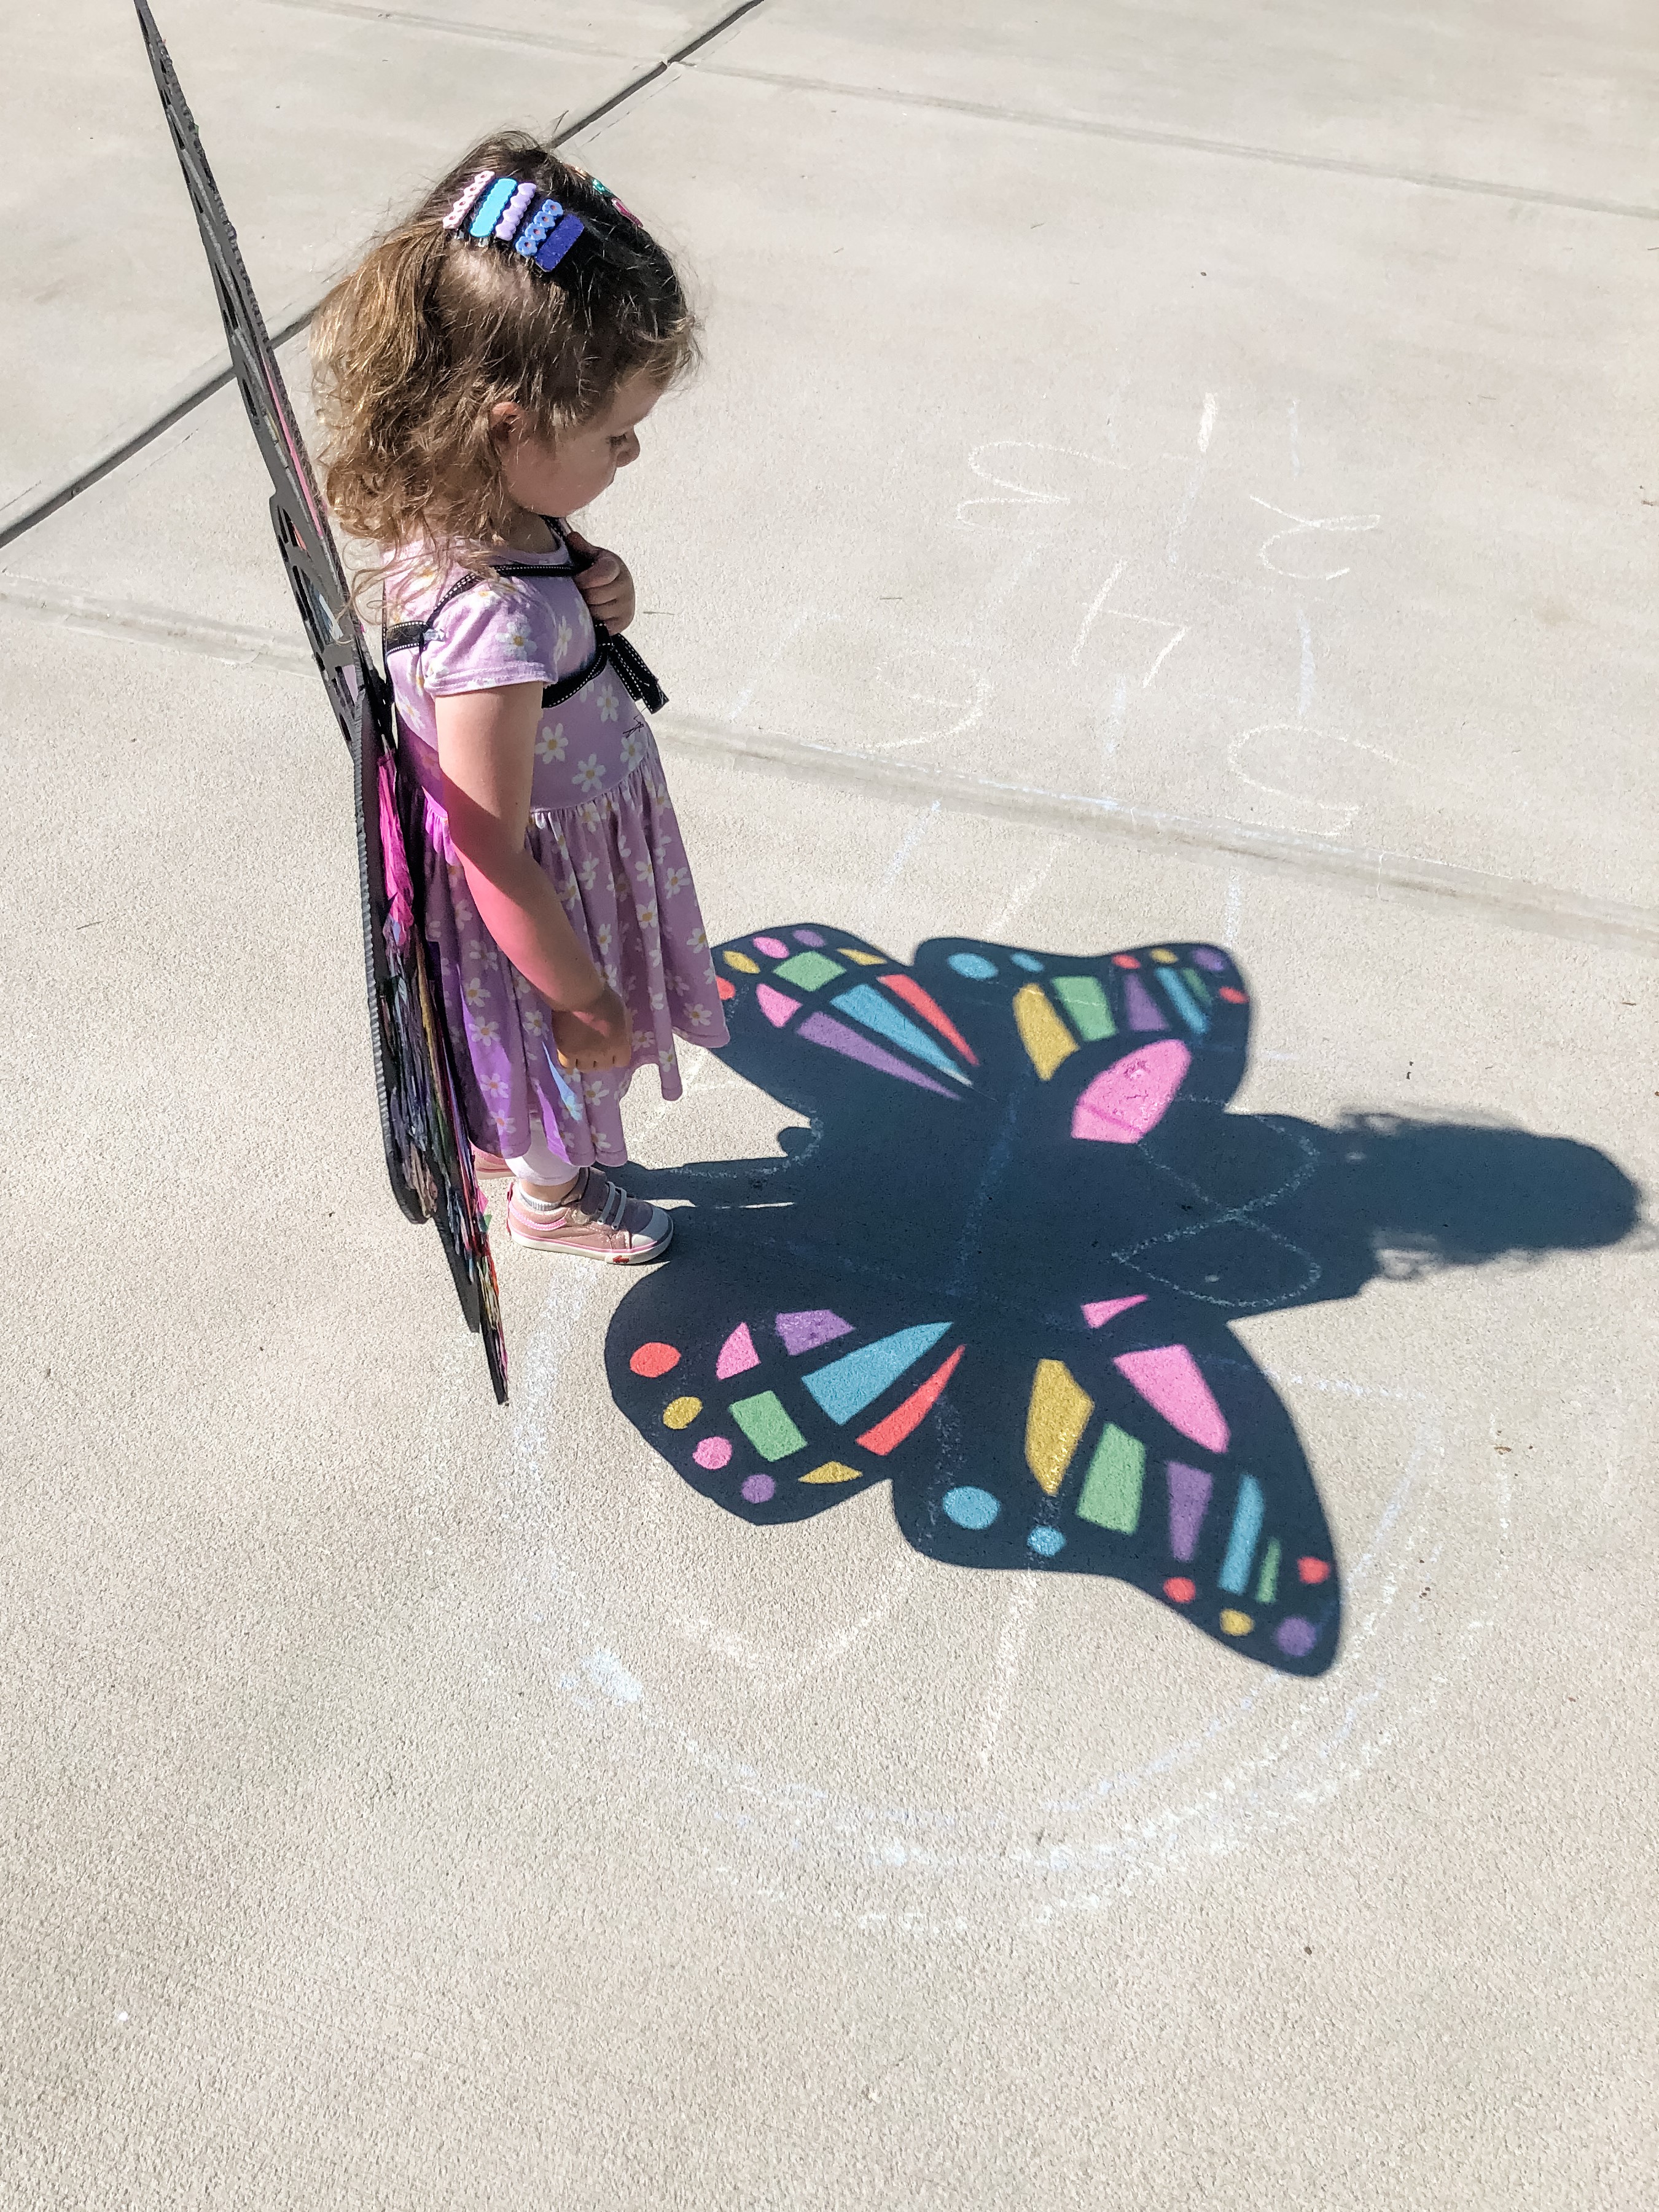
The next part can be done a few different ways. I made two big loops (one for each arm) for my daughter to slip on like straps. I then tied them onto the ribbon we just laced through that secures both wings together. You can either have the straps go on and off, or you can have them be tied together each time the wings are worn and untied when it is time to take them off. Depending on the size of your child in comparison to the size of the wings you cut out, you may need to adjust how you have everything fastened together to make them hang correctly/balanced. As you can see below, I had to adjust some straps from our ((big)) wings on my daughter’s little body!

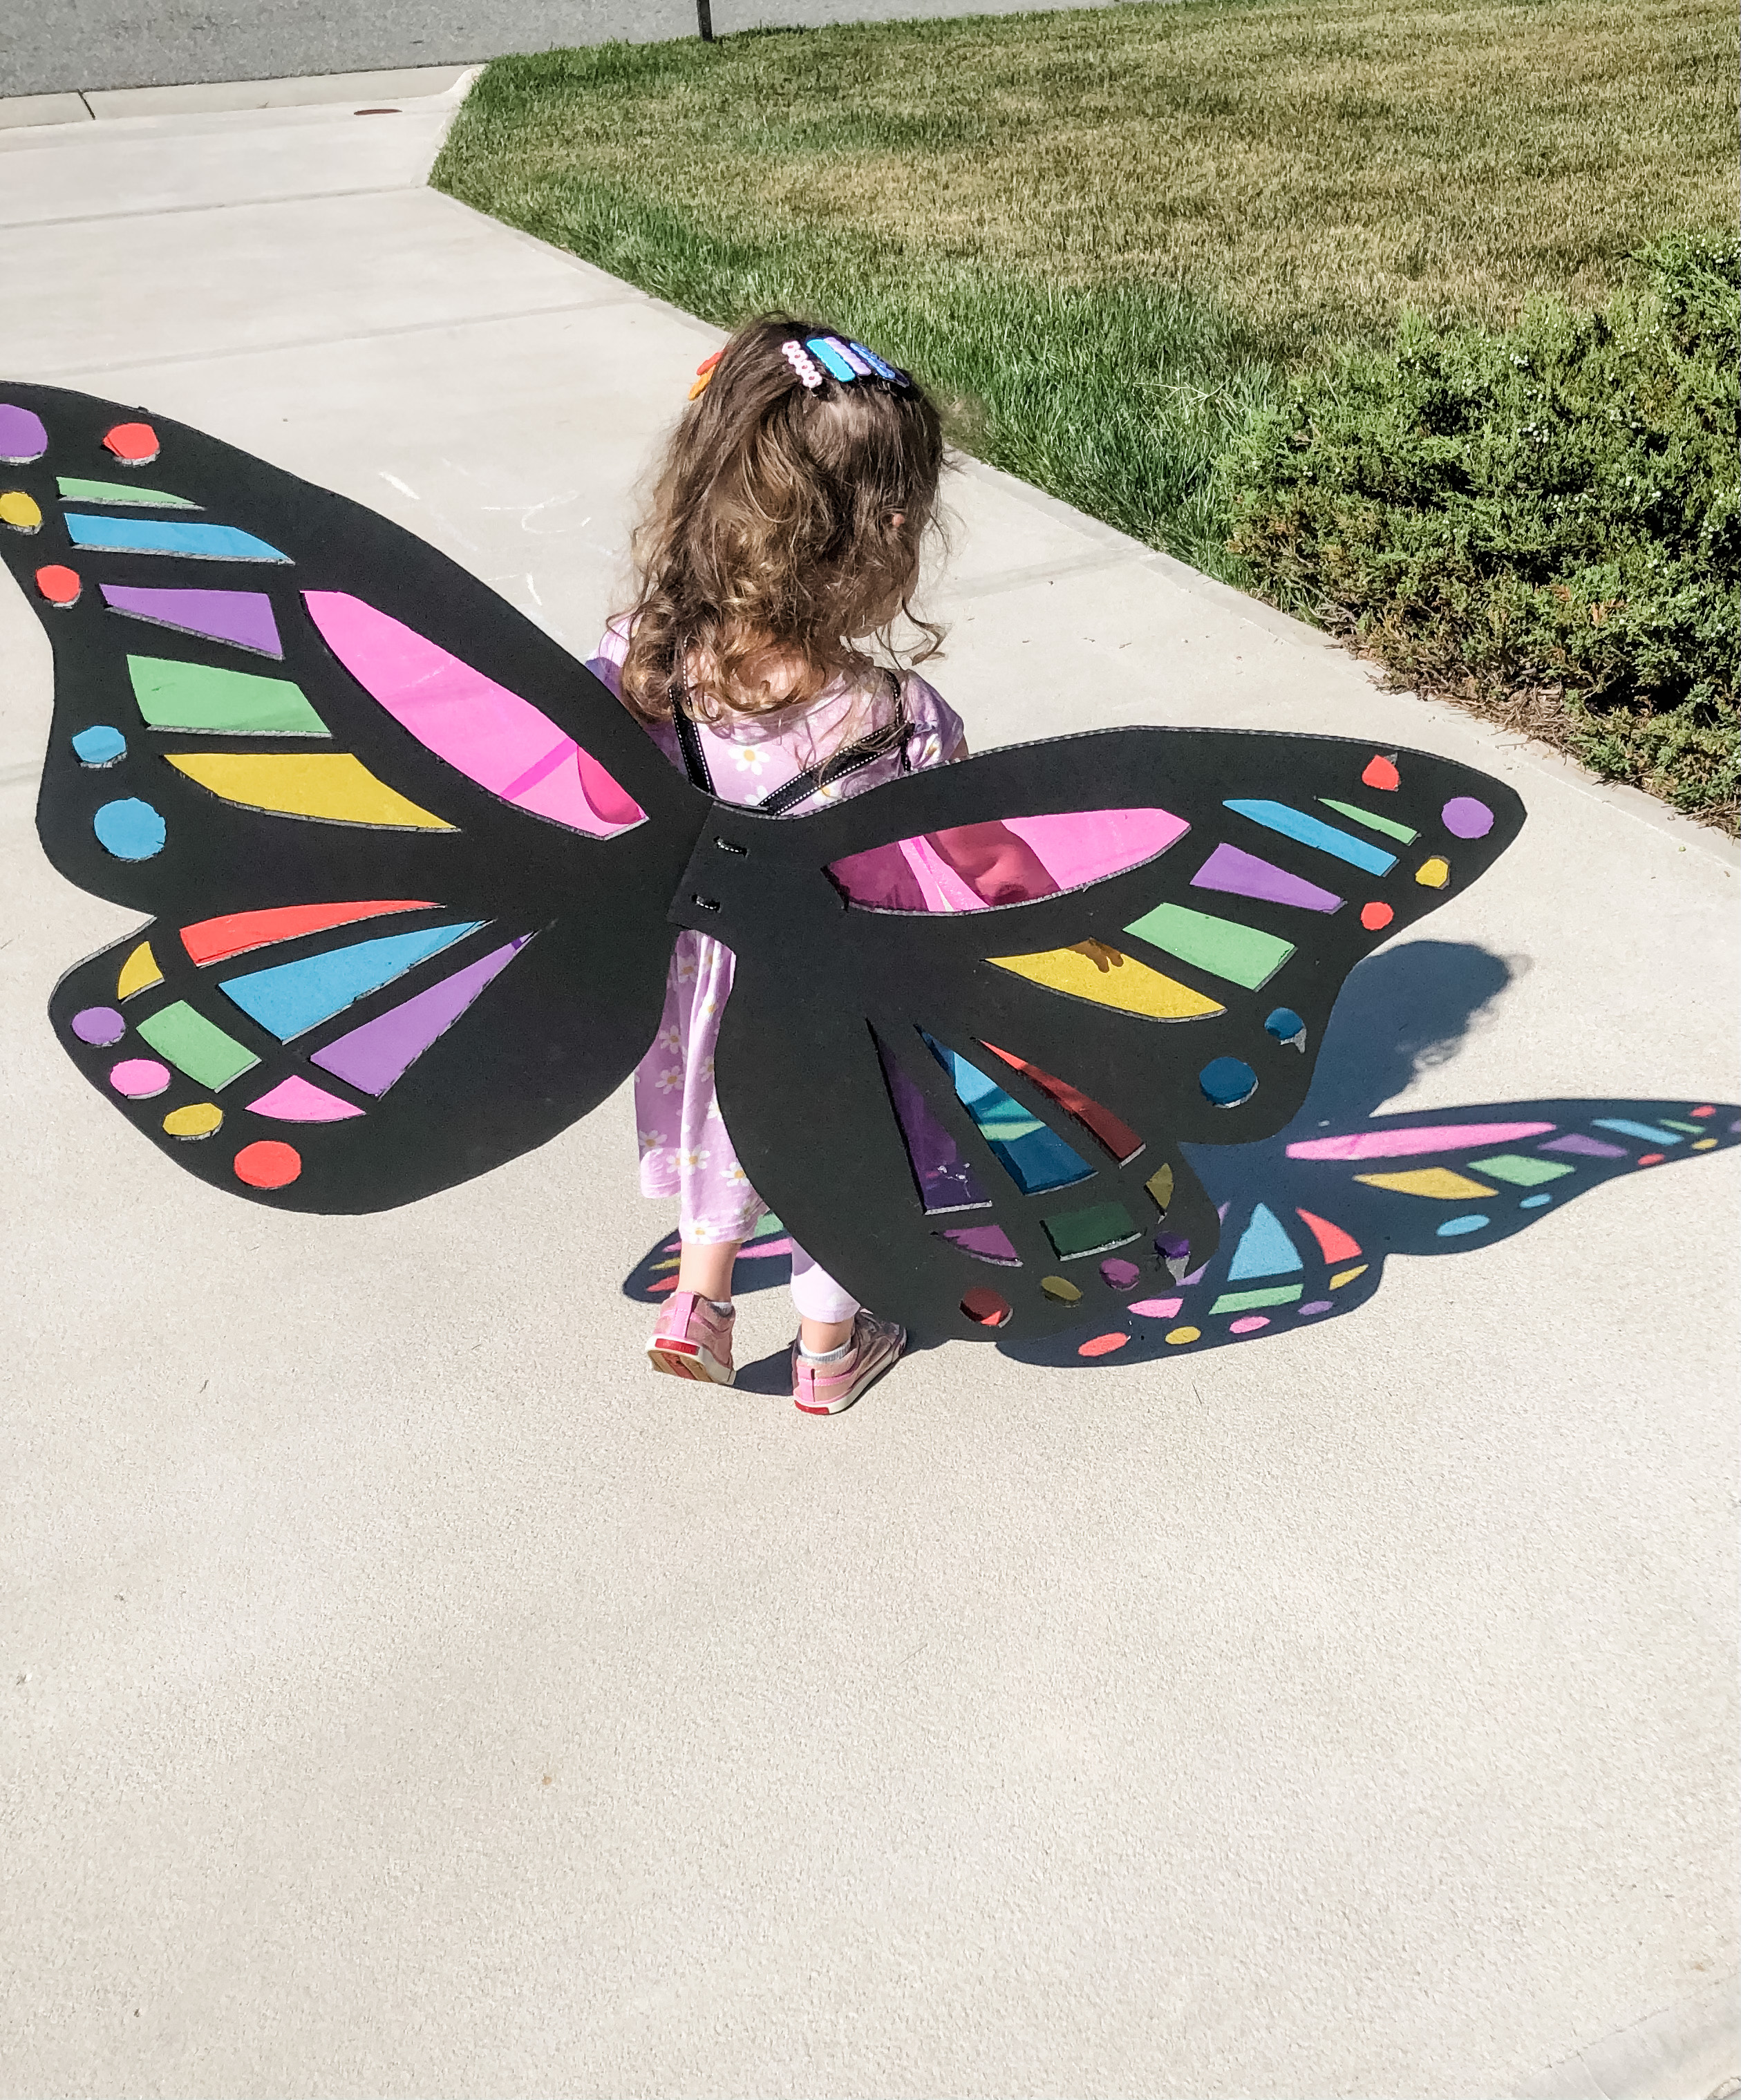
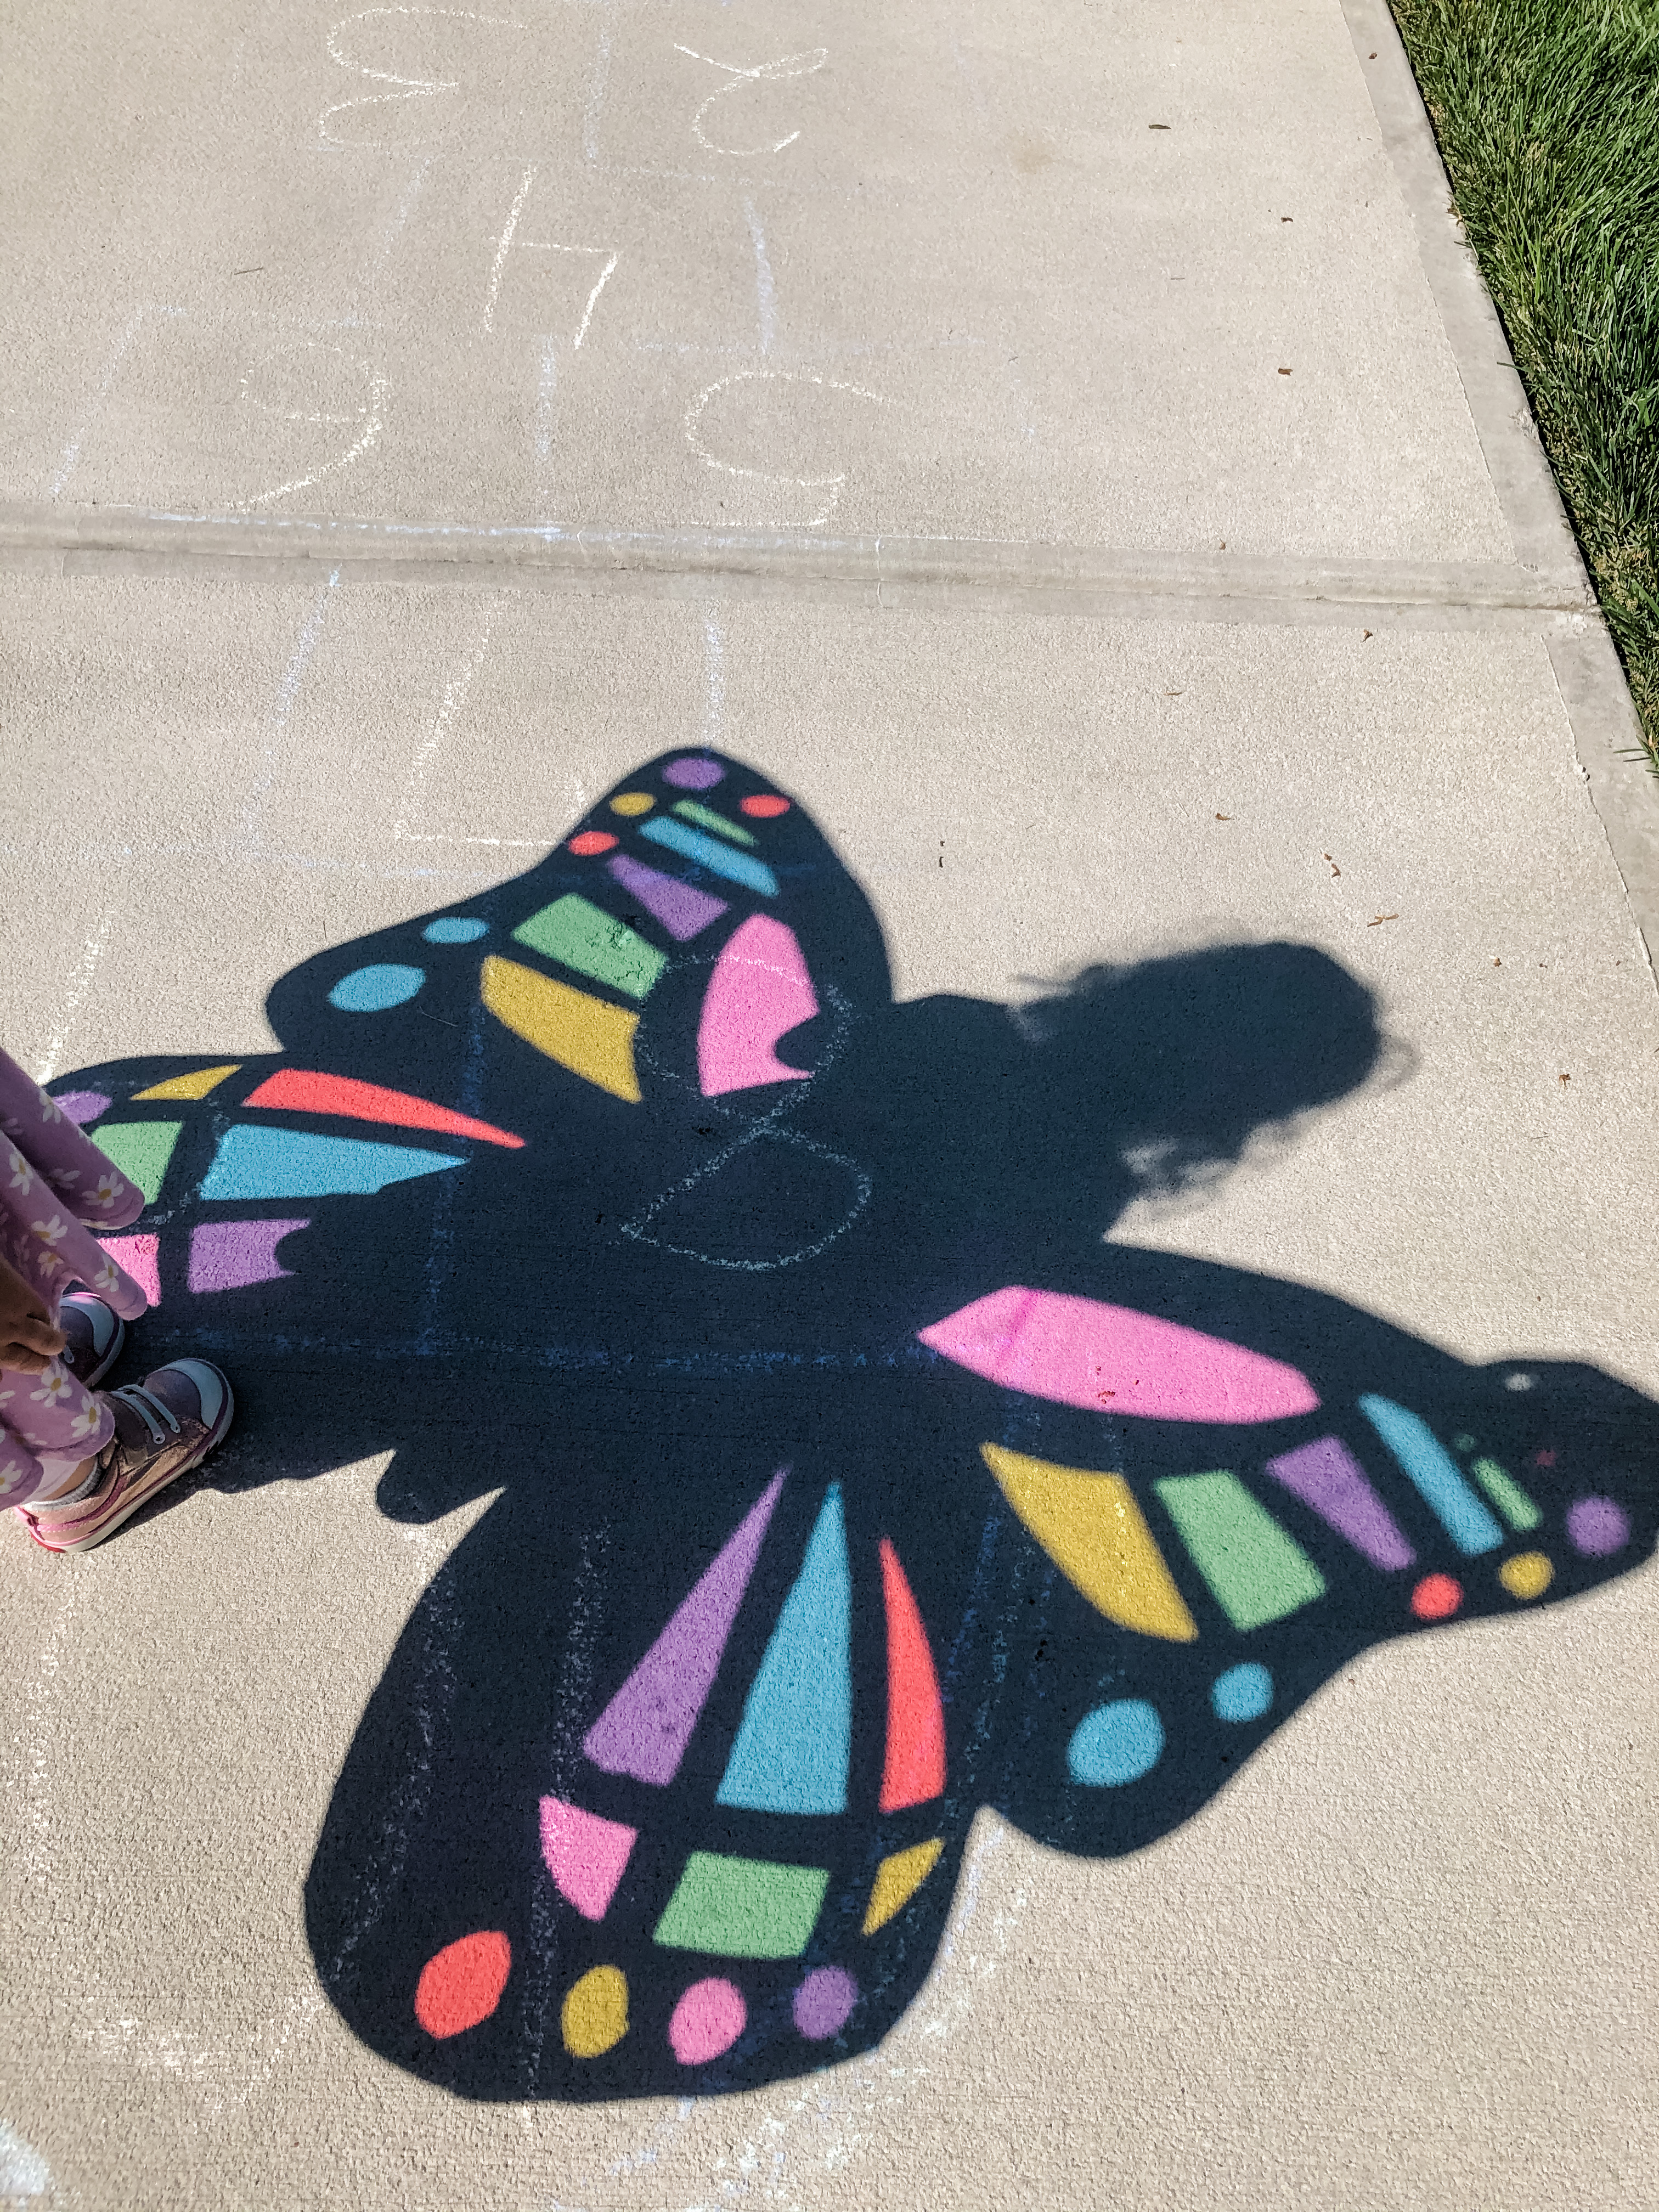
The next part is the most fun-head outside on a bright, sunny day and see how these wings reflect the sun on the concrete! The reaction I got from my girl when she saw her colorful shadow made it all worth while! These wings are so fun! I actually thought of some other ideas to do using a similar process with the cellophane and the sunshine…stay tuned on that one!
If you happen to make these gorgeous wings with your little one(s), I’d love to see them! Tag me on IG @kathryn.sloop 🙂


This is so much fun! You are amazing!!’